When Should I Consider Using a Professional 3D Scanner For Quality Inspection?
The quality inspection process usually involves testing, checking, or measuring one or more product characteristics and comparing them against a standard (such as a CAD model) to determine if the product is compliant or not (pass or fail). If you feel that your current inspection process has its shortcomings—whether it’s not as reliable, accurate, or fast as you want it to be—now is a good time to take a closer look and see what a professional 3D scanner has to offer. The quality of your manufactured goods directly impacts how people perceive your company—good or bad.
It’s easiest to understand why you should consider switching to using 3D scanning for quality inspection by addressing the challenges you might be facing today.
-
If you are questioning whether your inspection process is reliable.

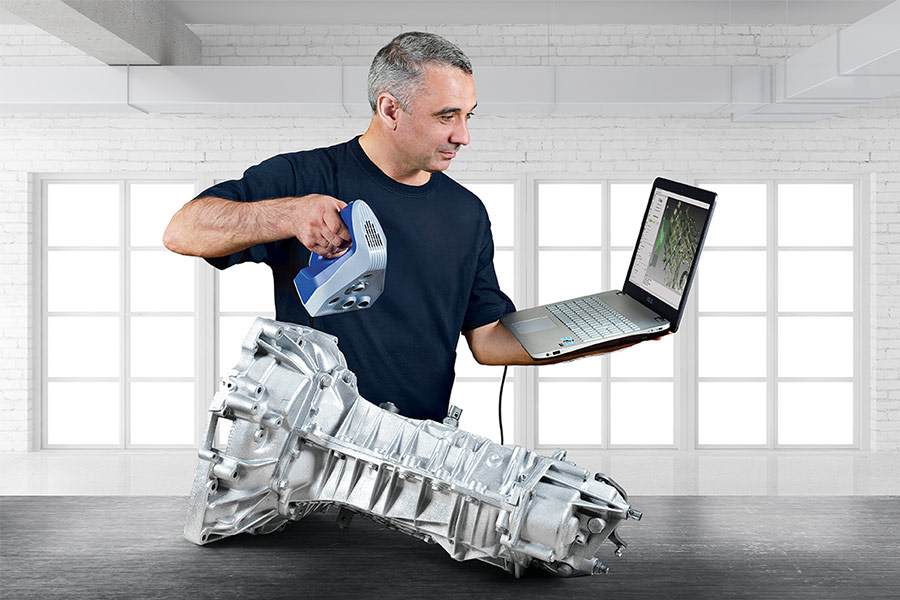
Conventional methods of inspection (ones that are done manually) heavily relying on employees to carry out standard operating procedures or use hand tools such as calipers to take measurements off a part to determine if a part pass or fail. Even if standardized inspection documents are set in place, the way inspection is being carried out can vary from person-to-person. 3D scanners minimize errors by taking out the human element out of the equation.
Much of the process of 3D scanning to inspection can be automated to eliminate manual work. This helps keep user interference to a minimum. Integrating a 3D scanner into the inspection procedure creates a repeatable process that can be trusted time and time again.
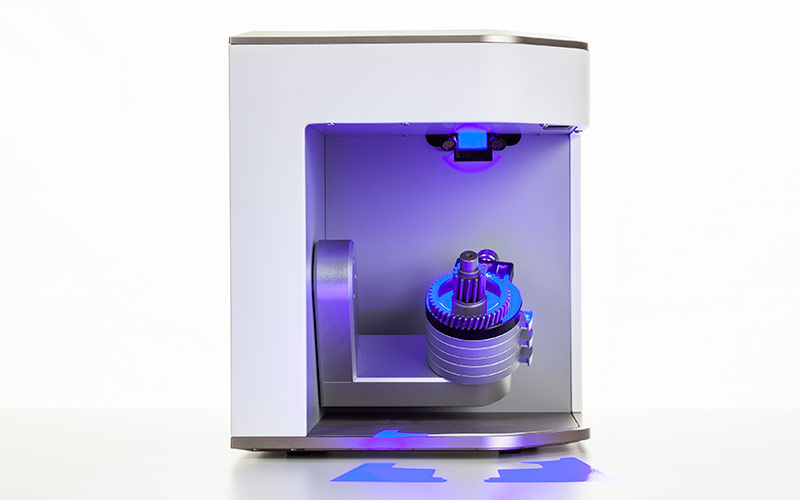
Artec Micro is a fully-automated desktop 3D scanner designed to deliver industrial-quality 3D scans with just one click. All the user has to do is place the part into the system. It can “see” well below the human visibility threshold of 40 microns (the width of a fine human hair1). -
If you are questioning whether your inspection process is accurate.

Honestly, no measurement tool is perfect. They all have a certain degree of measurement uncertainty but professional 3D scanners can be remarkably accurate (depending on the scanner’s specifications). Some can scan up to submillimeter accuracy. This makes 3D scanners an ideal choice for inspection applications.
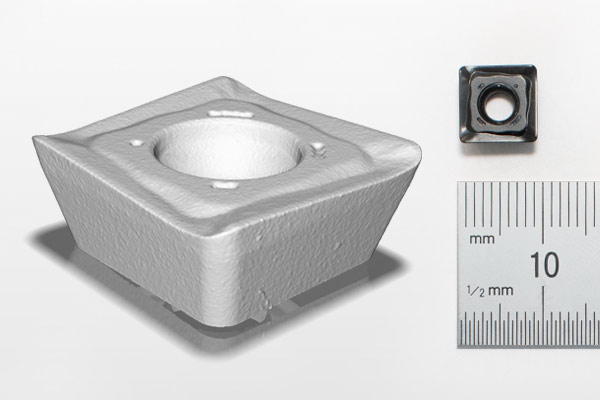
The HDI Compact C504 non-contact 3D scanner can even scan a small metal bit measuring 10mm with an accuracy of 6 microns (0.006 mm). -
If your parts are difficult to measure with other measurement tools.
Some measurement tools like rulers, calipers, and CMMs are great measurement tools for measuring rigid or prismatic surfaces. However, there are some surface characteristics that non-contact 3D scanners excel at taking surface measurements. These type of surfaces include:
- Complicated parts: Sometimes you have to take measurements of a part with organic surfaces, which can be difficult to measure with manual hand tools.
- Small parts: Tiny parts can be difficult to measure due to their size. They can contain components that can be easily be damaged when handled (i.e. circuit boards). Non-contact 3D scanners don’t need to touch the object so it won’t cause measurement interference.
- Parts difficult to carry to the measurement equipment: Some heavy components are too difficult to take to a measurement device like a traditional CMM. On the other hand, 3D scanners like wireless handheld 3D scanners and portable stationary 3D scanners make it much easier to scan by bringing the scanning equipment to the part.
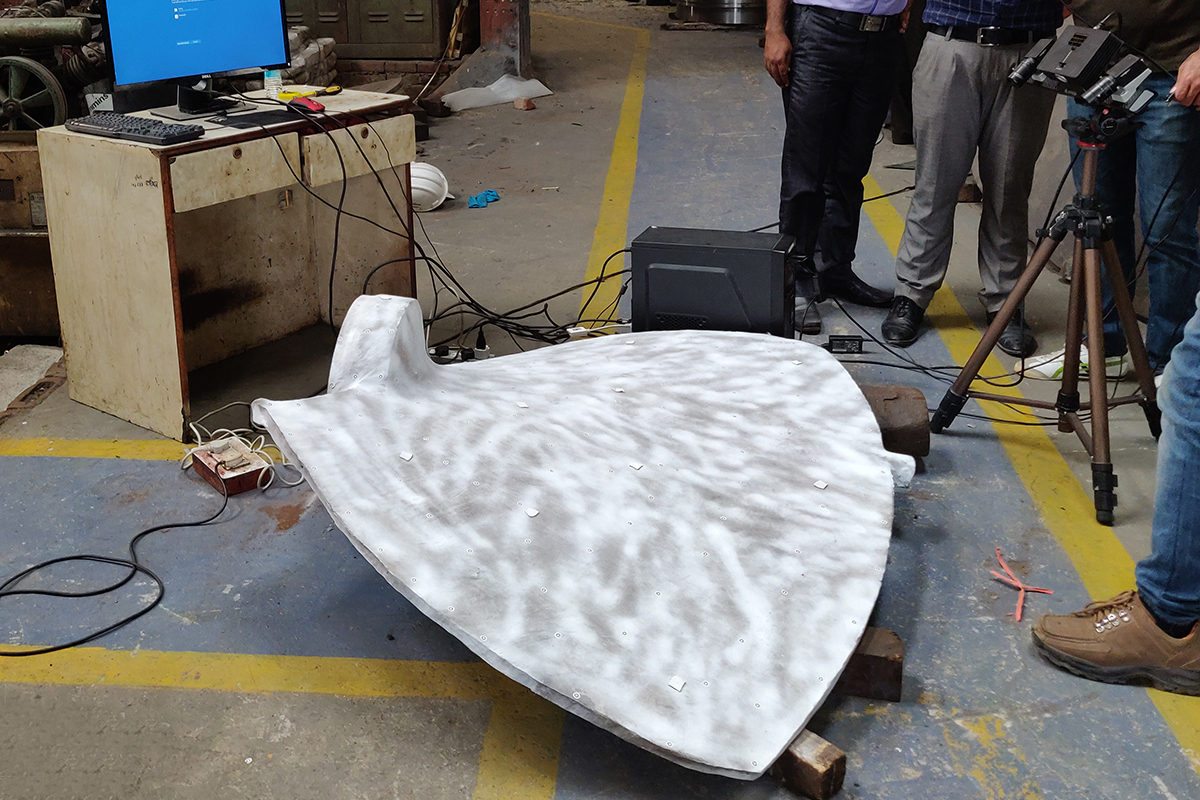
The HDI Carbon 3D scanner was a perfect candidate for this quality control project for measuring large heavy impeller blades due to its large field of view and portability. Previously, a known issue that 3D scanners have was taking measurements of dark or shiny surfaces (this is because they use light as a source for capturing 3D scans). Nowadays, technological advancement enables professional 3D scanners to overcome this challenge.
-
If your inspection process is slow at measuring parts.

3D scanners can take measurements fast. Instead of taking one measurement one at a time, many non-contact 3D scanning systems can take an area of the object’s surface with more than 1 million measurement points in just under a second.
The Artec Micro desktop 3D scanner captured a 1.5 cm plastic bolt in just three scans. The highly detailed 3D model highlights the bolt’s defects as well as its threads, making it an exceptional tool for quality inspection.
-
You want to get to the source of why your parts are failing.

Make Complex Challenges Much Simpler to Understand and Solve

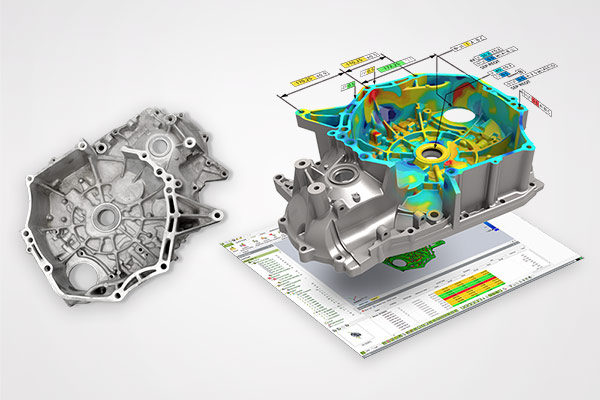
Sometimes it’s difficult to know where to start when given a complex measurement problem. 3D scanners equip you with comprehensive data. When paired with the right 3D inspection software, it can help you quickly to figure out the source of production issues. It provides a complete report to better understand the issue with the intention to significantly reduce downtimes in the manufacturing process.
Geomagic Control X compares a physical part’s measurements against a CAD model and provides a color deviation map to see where the problem areas occur at a glance.
See the Full Picture

You can capture a snapshot of the part with measurement information with a non-contact 3D scanner. It empowers you to identify issues in its entirety at once instead of just seeing one aspect of the part.
Other Considerations
Not all professional 3D scanners are designed for quality inspection. Resolution and accuracy of a 3D scanner are very important technical specifications to look at for this type of application. Talk with your 3D scanning provider to make sure you are choosing a 3D scanners are suitable for your specific application.
By implementing a 3D inspection process, you can:
- Have increased confidence your products are of high quality
- Speed up your manufacturing process
- Have less downtimes
- Be faster at solving underlying issues in your production process
As a result, your customers are happy because your company is putting quality products out in the market 🙂
– – –
Reference:
- Source: Science Focus, How small can the naked eye see?
- This article is partly inspired by Artec and 3D System’s eBook, Is 3D Scanning Right for Your Inspection Needs? It goes into further detail about how to select the right 3D scanner and 3D inspection software.
