Overview
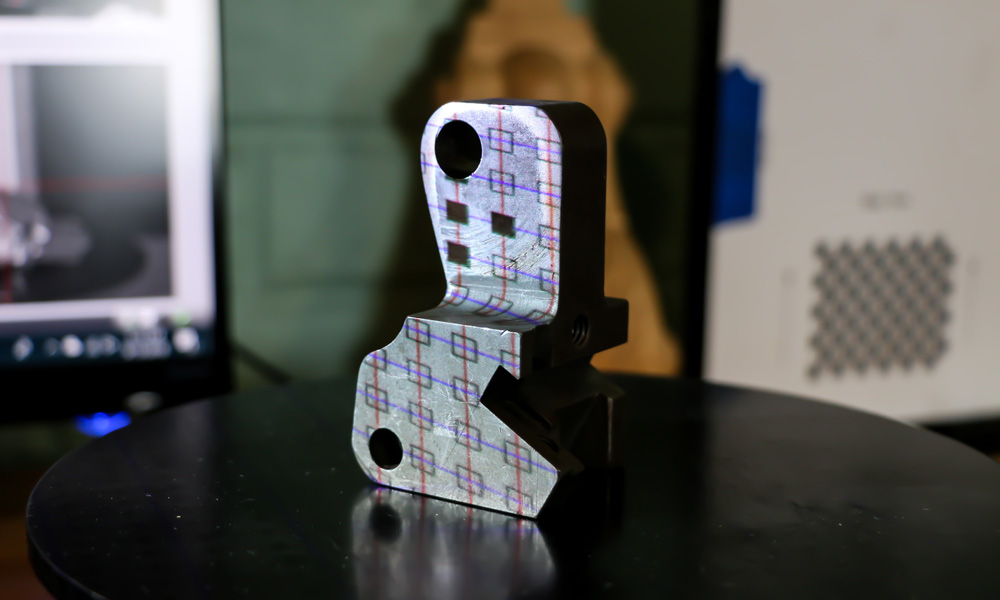
Clients frequently have parts from their facilities that are worn and need to be replaced. These parts do not always have original CAD files available to send to a machinist. Reverse engineering is the process of recreating a part that already exists. This method is crucial for these types of scenarios.
In order to recreate parts, 3D scanners can be used to take accurate and detailed information about the physical object to help develop a CAD model.
The workflow for reverse engineering from scan to CAD is as follows:
Different 3D scanners (hardware) and different reverse engineering programs (software) can create a variety of results. When recreating an object it is important for users to understand what is their intended outcome. Maybe the hole placement on some sheet metal is crucially important but the edges of sheet of metal do not matter as much. Potentially, some applications require a much higher accuracy and detail while others only require a general shape.
This article demonstrates the Scan to CAD process by reverse engineering an industrial part quickly within a 0.01” (0.254 mm) tolerance. For this test, there are two paths I used to get there.
The standard package includes a Metron E 3D scanner and Ansys SpaceClaim which can handle most reverse engineering projects just fine. The high precision package has its advantages with the more accurate Metron E-HD 3D scanner and a feature rich CAD modeler Geomagic Design X. Both have their place in the market which I’ll delve into those details here. Here, I’m evaluating the standard versus high-end scan to CAD package as a whole, meaning I’m testing the 3D scanner and reverse engineering software as a single entity.
| Scan to CAD Solution | #1: Standard Scan to CAD Package | #2: High-End Scan to CAD Package |
|---|---|---|
| Structured-Light 3D Scanner |
Standard Model: E (1 megapixel system with up to 60 micron accuracy per scan) |
High Definition Model: E-HD (5 megapixel system with up to 25 micron accuracy per scan) |
| Reverse Engineering Scan to CAD Software |
 SpaceClaim
Direct Modeling |
 Geomagic Design X
Parametric Solid Modeling |
In this demonstration, the goal is to showcase a standard reverse engineering package against a high precision package within a practical application.
For the test, each solution must accomplish the reverse engineering task within a two hour time frame.
Steps
- Scan an industrial machined part with the Metron E and E-HD 3D scanners.
- Build 3D CAD models from both sets of scan data using SpaceClaim and Geomagic Design X.
- Compare the parts to the HD scan data to reveal deviations.
Scan
The first step for reverse engineering parts is getting good scan data to work with. For this demonstration, I used the structured-light based Metron E 3D scanner powered by FlexScan3D 3D scanning software.
Metron3D offers two types of Metron E series 3D scanners, the standard edition (E model) and the high definition edition (HD model). The Metron3D scanners can service many parts of the 3D scanning industry.
The Metron E model takes approximately 1 million points per scan while the E-HD model takes approximately 5 million points per scan. Due to the density of the scan data, these 3D scanners allow for very detailed models that show tiny features like small fillets as well as subtle wear patterns.
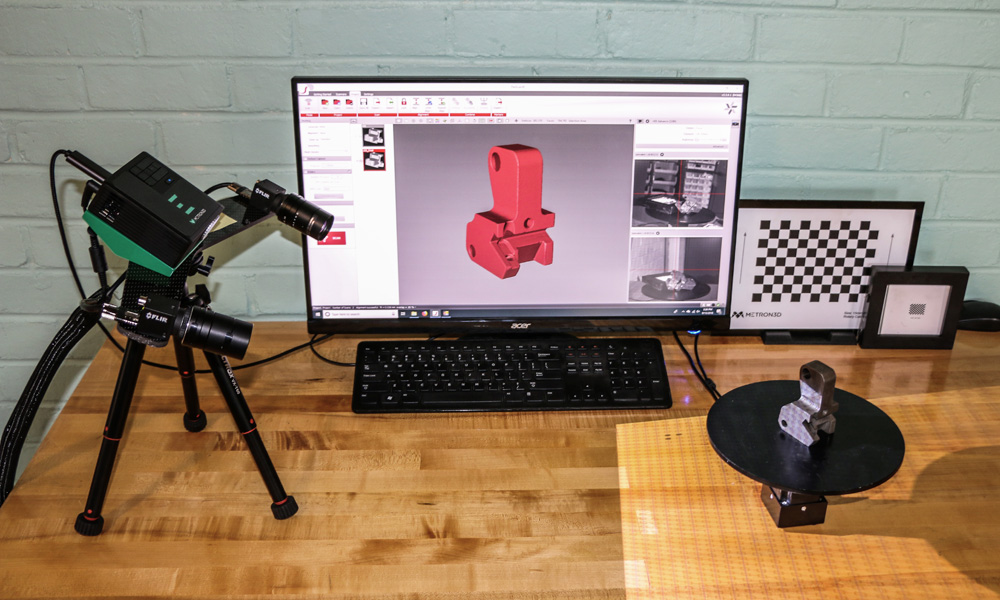
FlexScan3D 3D scanning software was used for capturing the data.
The part we want to reverse engineer was a basic machined industrial part. It was placed on an automated rotary table to speed up the scanning process. Several scans were taken with the part at several different angles. This allows for complete coverage of the surface area of the part. Like most structured-light 3D scanners, the only challenging areas to scan are inside the holes. Light reached the top perimeter of the hole but not much deeper. Fortunately all that is required to reverse engineer a hole is a simple 2D profile. The rest of the geometry is easily captured. This process is repeated with the Metron E-HD model 3D scanner. Once I was satisfied with the how data looks it was exported as .stl files.
Build
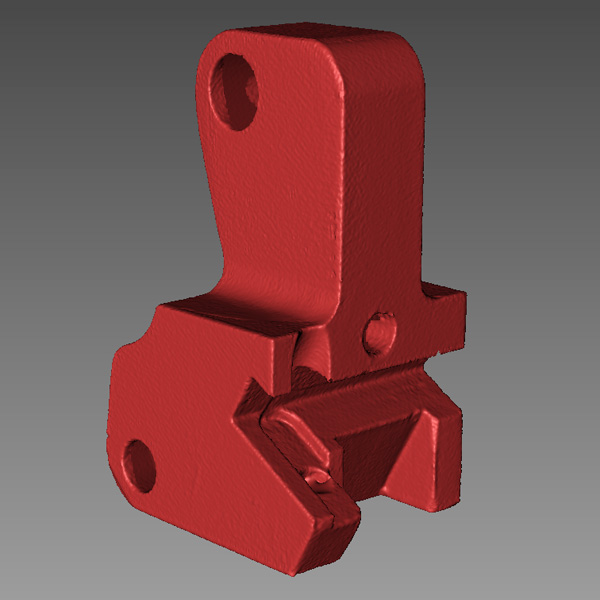
The .stl files get imported into two main CAD modelers. This demonstration is meant to represent two differently priced scanning packages, so the Metron E data is imported into SpaceClaim, a lower cost direct CAD modeler. SpaceClaim is great at high speed modeling and has a robust tool set for investigating profiles of scan data. These profiles are used to map the layout of part features. Quick snapping tools allow for accurate placement of lines and curves to get an accurate model of the scan data.
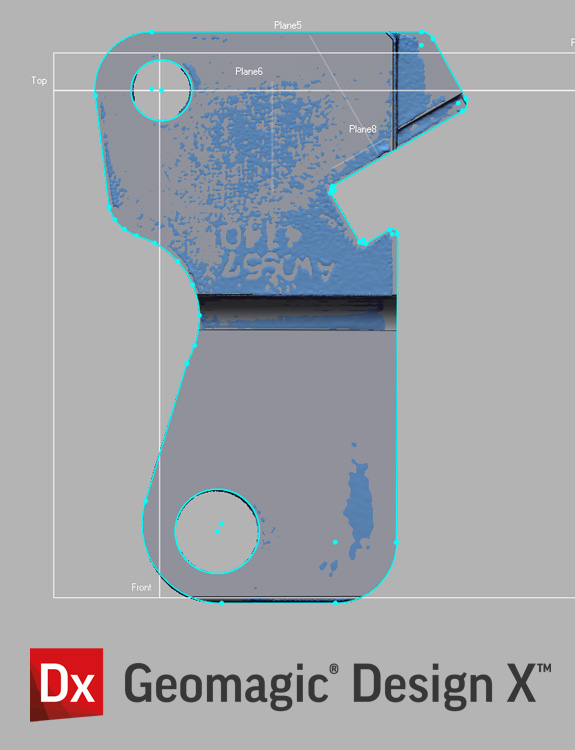
The Metron E-HD data is imported into Geomagic Design X, a premier parametric solid modeler that was developed to handle scan data effectively. The tool sets allow for cleaning up data quality that aids in optimizing point clouds before modeling. It also contains feature rich modeling tool sets that allow users to glean the most information from their data. Although modeling takes a little more time, Geomagic Design X has a greater capacity to handle a variety of reverse engineering challenges. Both programs are good in their own right for different needs.
Compare
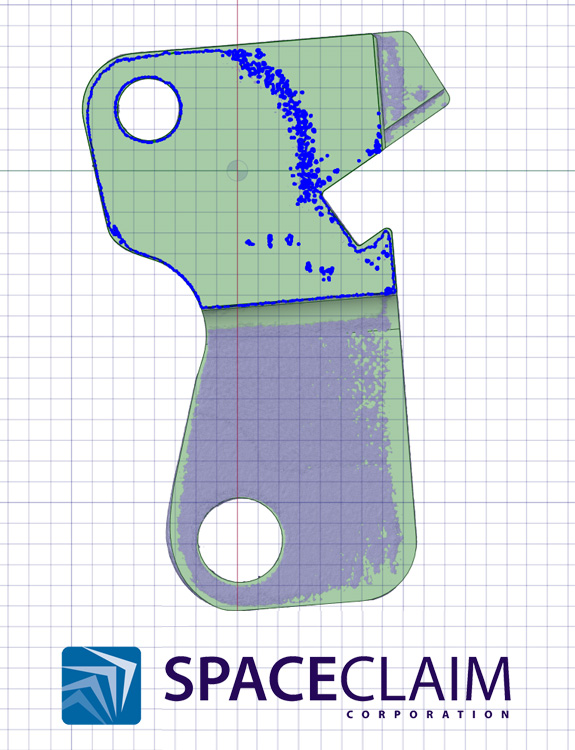
I now have a CAD model from each set of scan data. Using Geomagic Control X, I was able to use three dimensional deviation tools to understand how accurate I was in building the CAD models. Control X is an inspection software that allows users to understand very specific quantitative information about parts.
I used the Metron E-HD scan data as my reference and directly compared the CAD models. A color mapping tool was used as a representation of where my CAD was in tolerance and where I missed features or added too much. The orange and red represent too much material while blue represents a lack of material. The tolerance can be adjusted to fit the requirements of the given project.
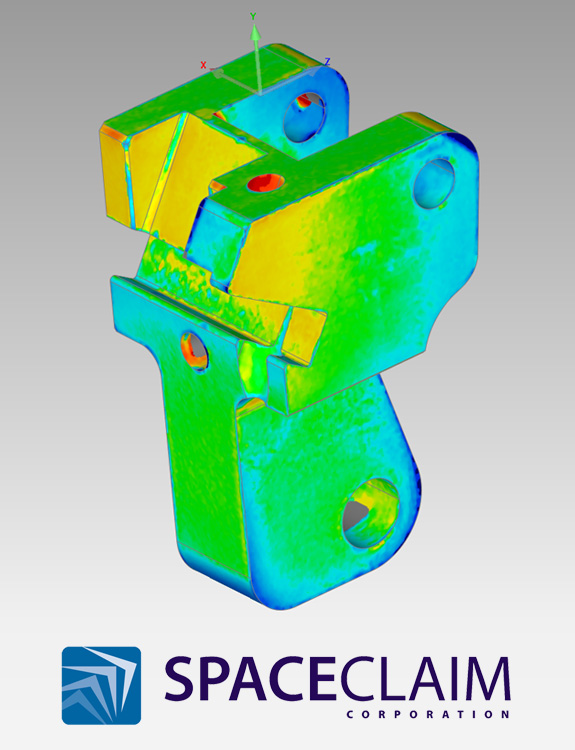
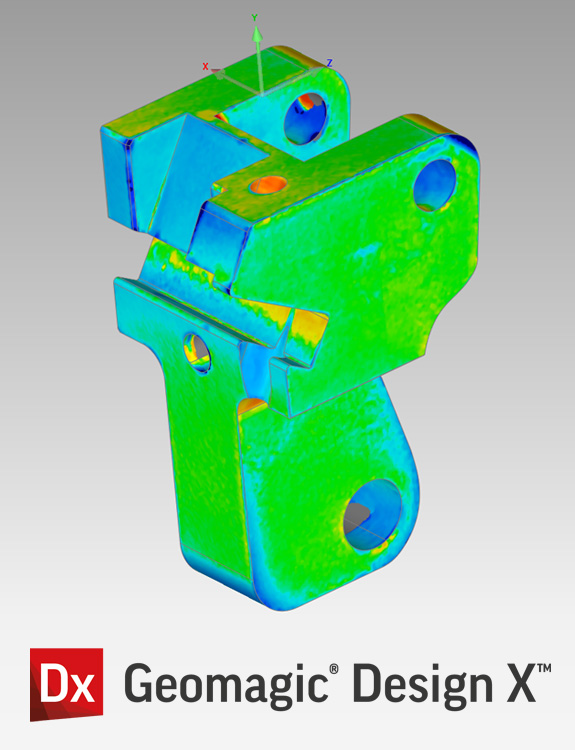
The results of this test show that on average the Metron E and SpaceClaim combination yielded a part that contained 220 microns (0.0087”) in deviations. For some industries this is plenty accurate for their application. But if high accuracy is crucial then the Metron E-HD and Geomagic Design X pick up the slack with an average of 25 microns (0.00098”) in deviations. This calculation was based on the average of five important features that needed to be most accurate. Below is a table of the specific measurements in comparison to the “Actual” values. Since I didn’t have the real Actual value, this number was derived from plane averages from the HD scan and was reconfirmed with a caliper for accuracy.
Disclaimer: I could have spent hours more on each part trying to make them more accurate in each program respectively. Instead I limited myself to a two hour window for each program in order to demonstrate what the same person with the same amount of time was able to achieve in both scenarios.
| Tested Area | Metron E & SpaceClaim | Metron E-HD & Geomagic Design X | Actual |
|---|---|---|---|
| Stem Thickness | 19.7892 mm | 20.0014 mm | 20.01 mm |
| Height | 86.4534 mm | 86.7682 mm | 86.74 mm |
| Head Thickness | 46.7824 mm | 47.1013 mm | 47.08 mm |
| Head Hole Radius | 4.7812 mm | 4.6103 mm | 4.625 mm |
| Stem Hole Radius | 6.4981 mm | 6.4 mm | 6.36 mm |
| Average Deviations | 0.21986 mm | 0.02256 mm | 0 mm |
Conclusion
When reverse engineering a part, there can be many challenges. SpaceClaim and Geomagic Design X handle scan data differently and make different assumptions about what’s important when building out features.
For example, in Geomagic Design X, when making a plane from scan data users can ask the program to take an average from the selected area, or take the maximum or minimum. In order to avoid a bump on the surface that would have thrown off the average, I opt to use minimum and it may have cut the wall too shallow. It also might be the case that the part is worn at an angle and there is not true flatness on one side. SpaceClaim, on the other hand, takes the average of the selected area.
Sometimes issues can compound themselves if the user is not careful. In the workflow I’ve highlighted, it is important to align a scan to world coordinates before building out the CAD. This is because the part can get slightly shifted or offset making all features offset. Building off of clean coordinates from the begining can eliminate these problems.
Design Intent for the CAD is crucial as one user may want to perfectly replicate the part where another may want to replace it with a part that is not worn or deformed. To an extent, all measurements are relative to what is truly important. Frequently, we can get caught up trying to make things perfect when those features aren’t critical to the final build.
Takeaway
Overall, the results of this experiment are good. The standard Metron E model and SpaceClaim combination are powerful enough for most of the projects we encounter at the GoMeasure3D lab. SpaceClaim is the preferred CAD modeler for the lab when we are on a time crunch and we need an efficient way to produce a full model. When that extra tight tolerance is crucial, Geomagic Design X is the only option that can perform at that level. Weighing the needs of a project can help find the right solution for any reverse engineering challenge.